Creating a Blank Email Template in Boingnet is easy
Boingnet’s template creation process allows you to create a blank email template if you want to build your own creative without using our editor, or if you want to quickly copy and paste HTML from another email template that you’ve worked on using other software. Often, email designers will prefer to develop HTML in editors they’ve been using for years. Boingnet gives you the flexibility to just copy and paste source code to get a template started. Since this option requires knowledge of HTML and CSS it is intended for experienced developers. Note: If you have text, images or other assets in a Word document that you’d like to add to your template, DO NOT copy them directly from Word into your template. Copy them first into Notepad and then into your template, you’ll get much better results that way.
Start Free Trial
- From the navigation bar, click Build.
- From the drop down menu, select Templates.
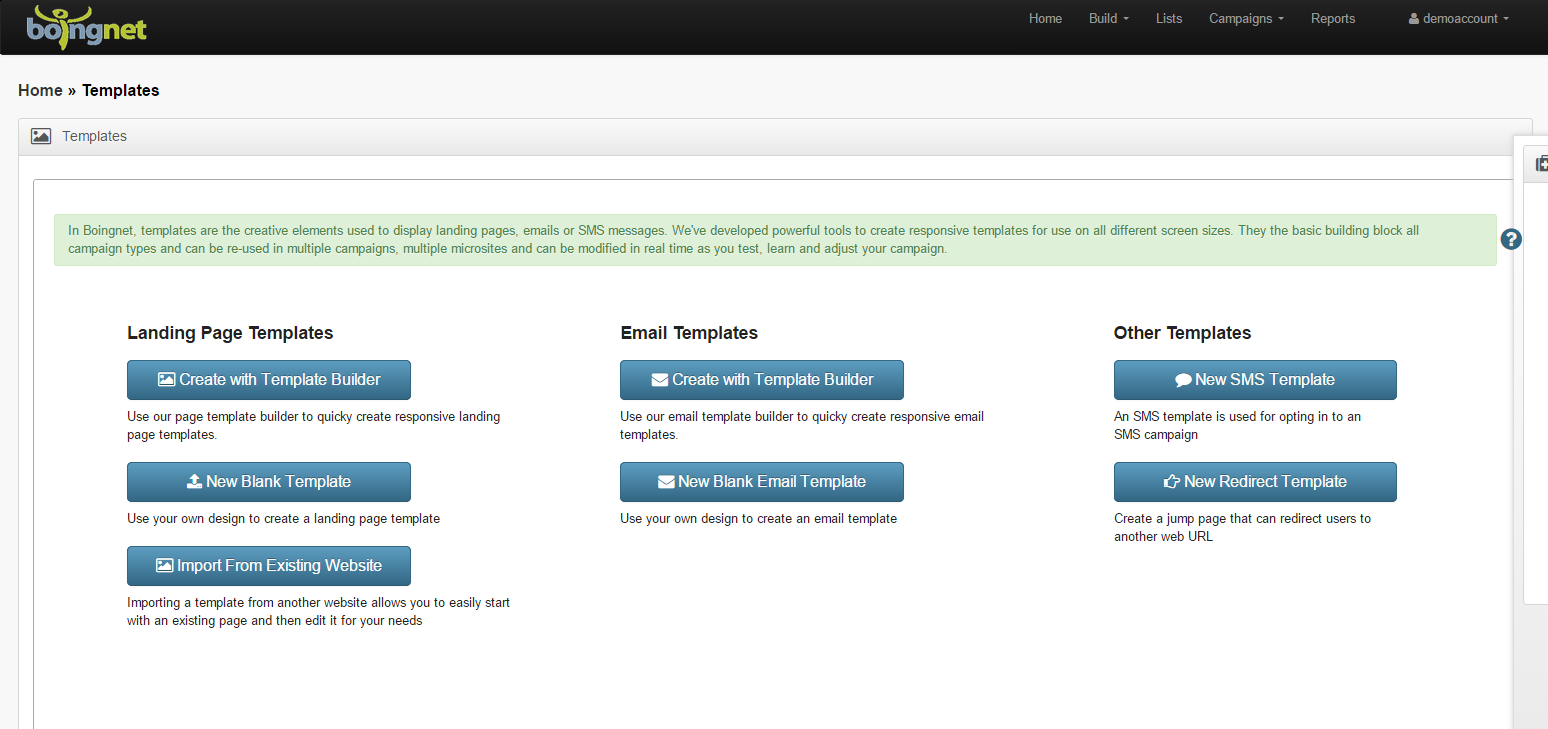
- Next, click on Create a New Template.
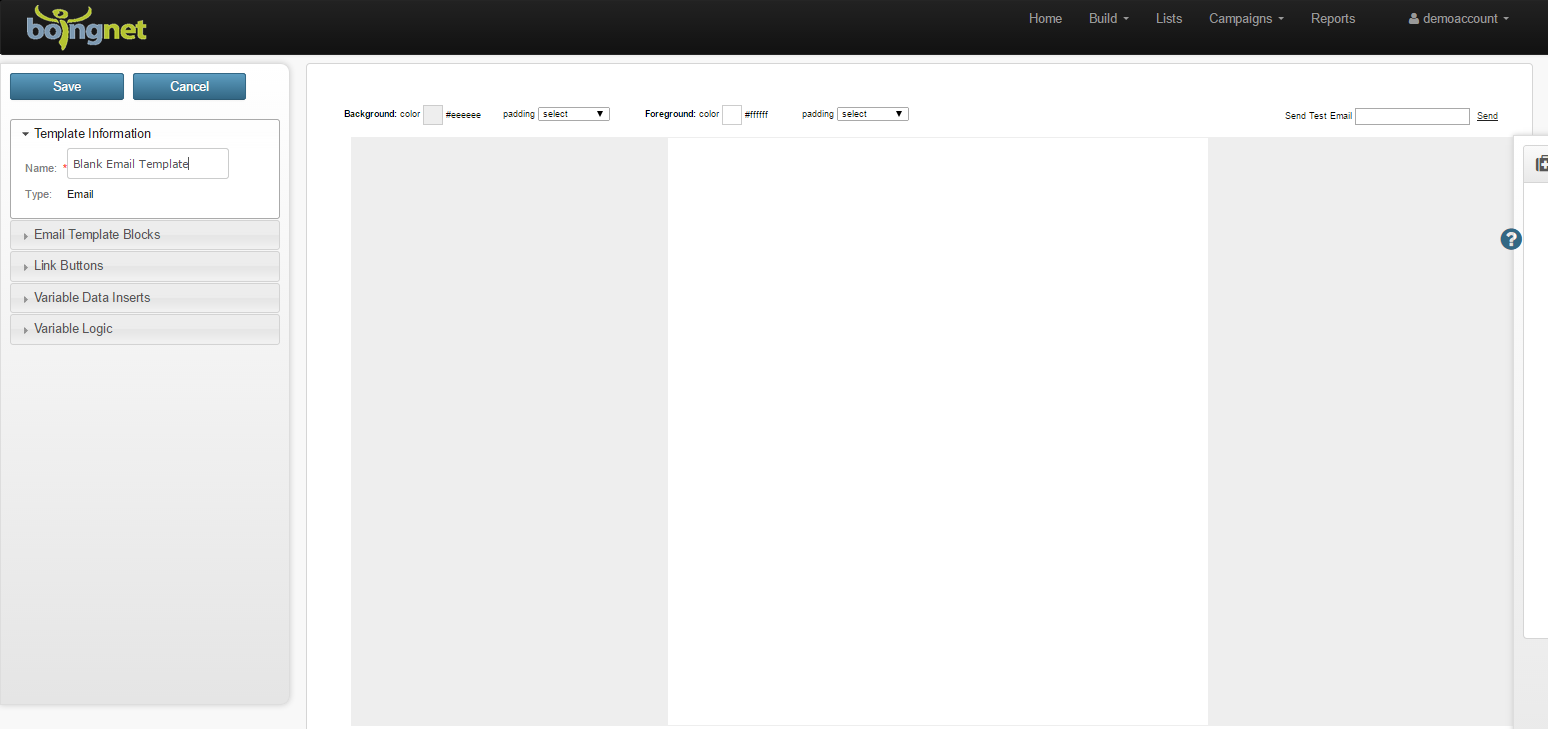
Select New Blank Email Template to access the template editor’s blank email page. From here you can copy and paste your email design, insert an image, insert variable logic, and insert variable fields.
Our template editor has a two sidebars. The sidebar on the right is the Help Sidebar, and it gives you easy access to pertinent help articles. The Template Sidebar on the left offers several features to help you create your email template. Underneath Template Information, enter a Name for your template, otherwise it will be saved with a generic time stamp for a name.
Background Color Editing:
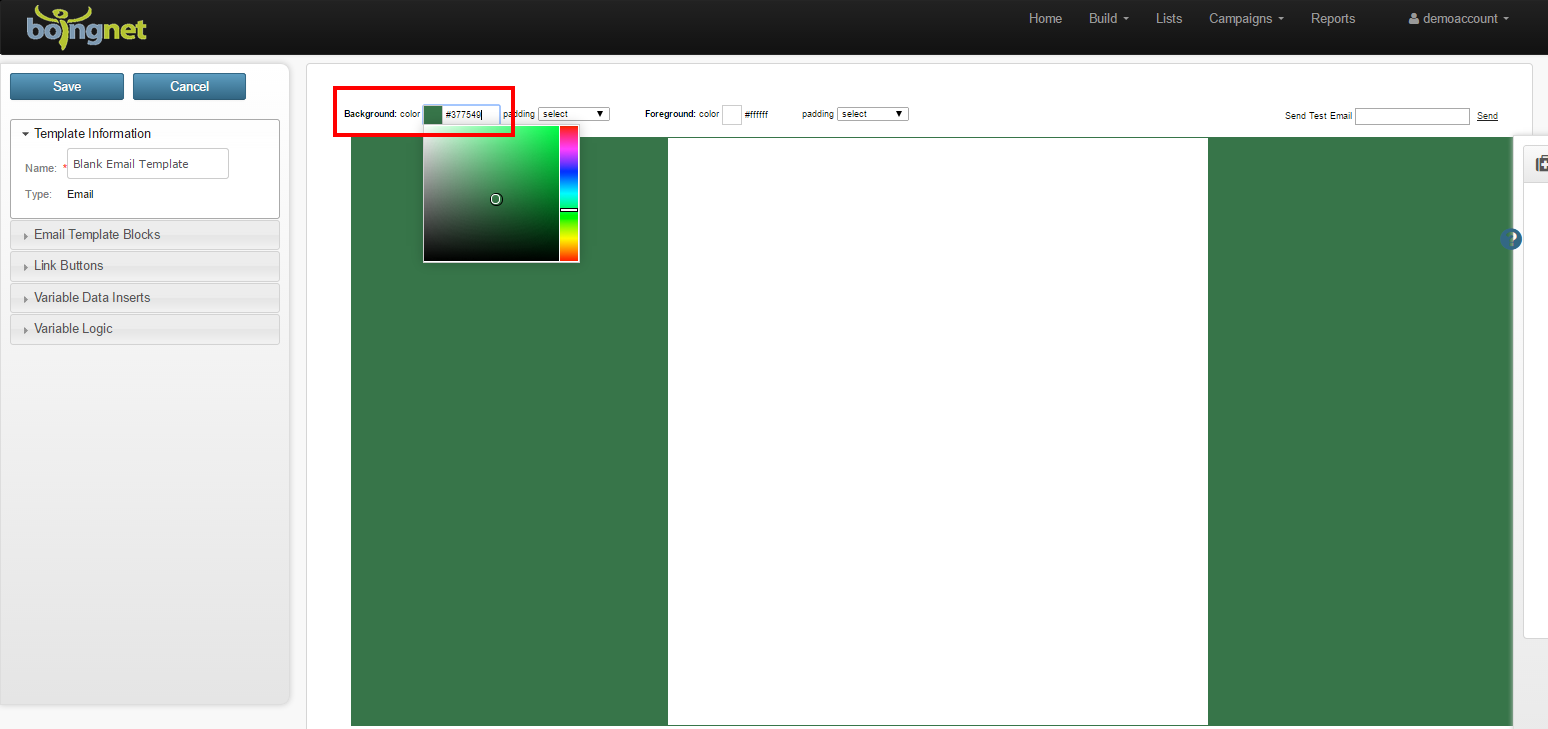
You can easily select and adjust the background color of your email template. Click the box next to ‘Background: color’ at the top of the template to display the color-picker wizard:
To select your background color – click on a color on the right side of the box, and then click on a shade on the left side of the box. You can easily change this color by repeating the process.
Foreground Color Editing:
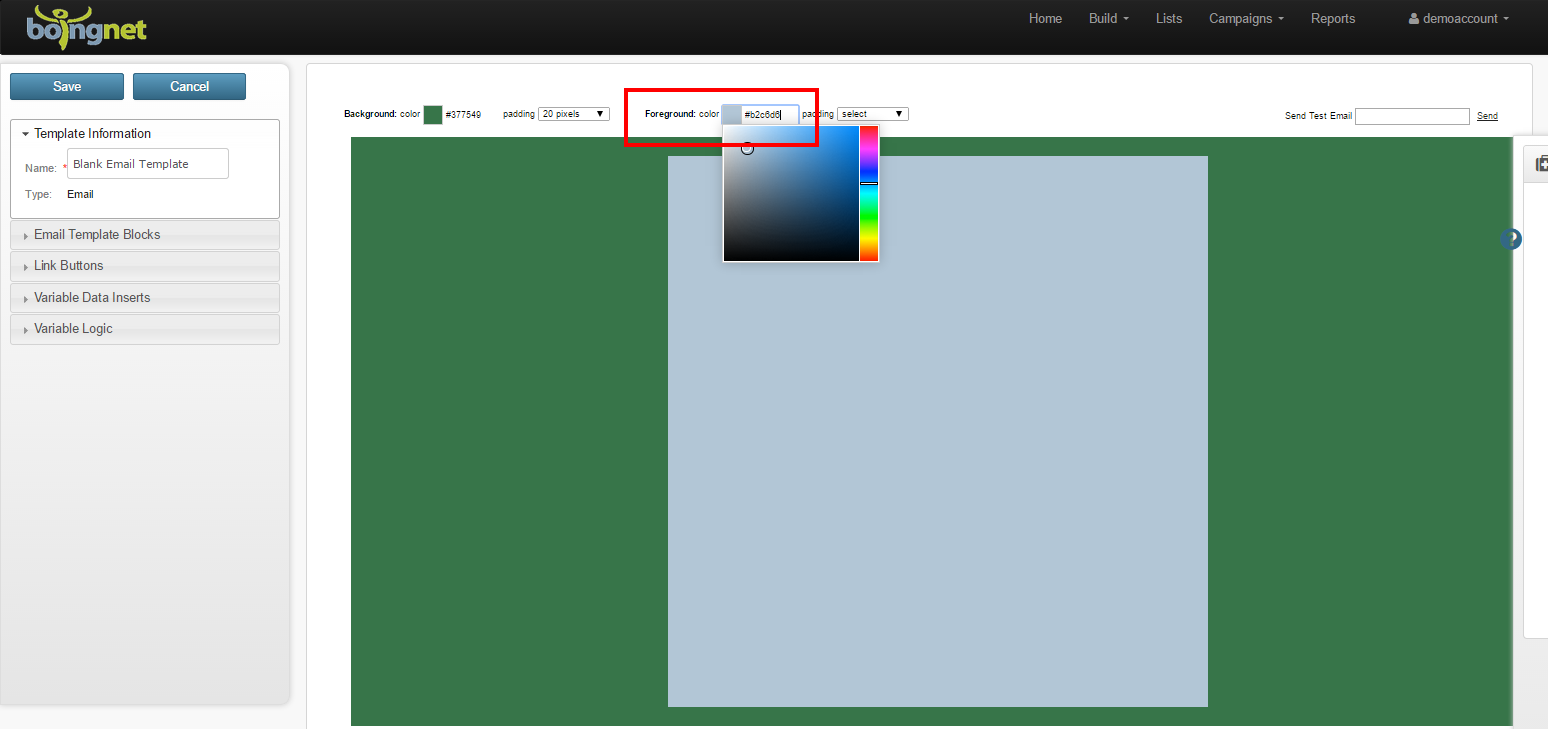
Click on the box next to ‘Foreground: color’ at the top of the template to display the color wizard:
To select your foreground color – click on a color on the right side of the box, and then click on a shade on the left side of the box. You can easily change this color by repeating the process.
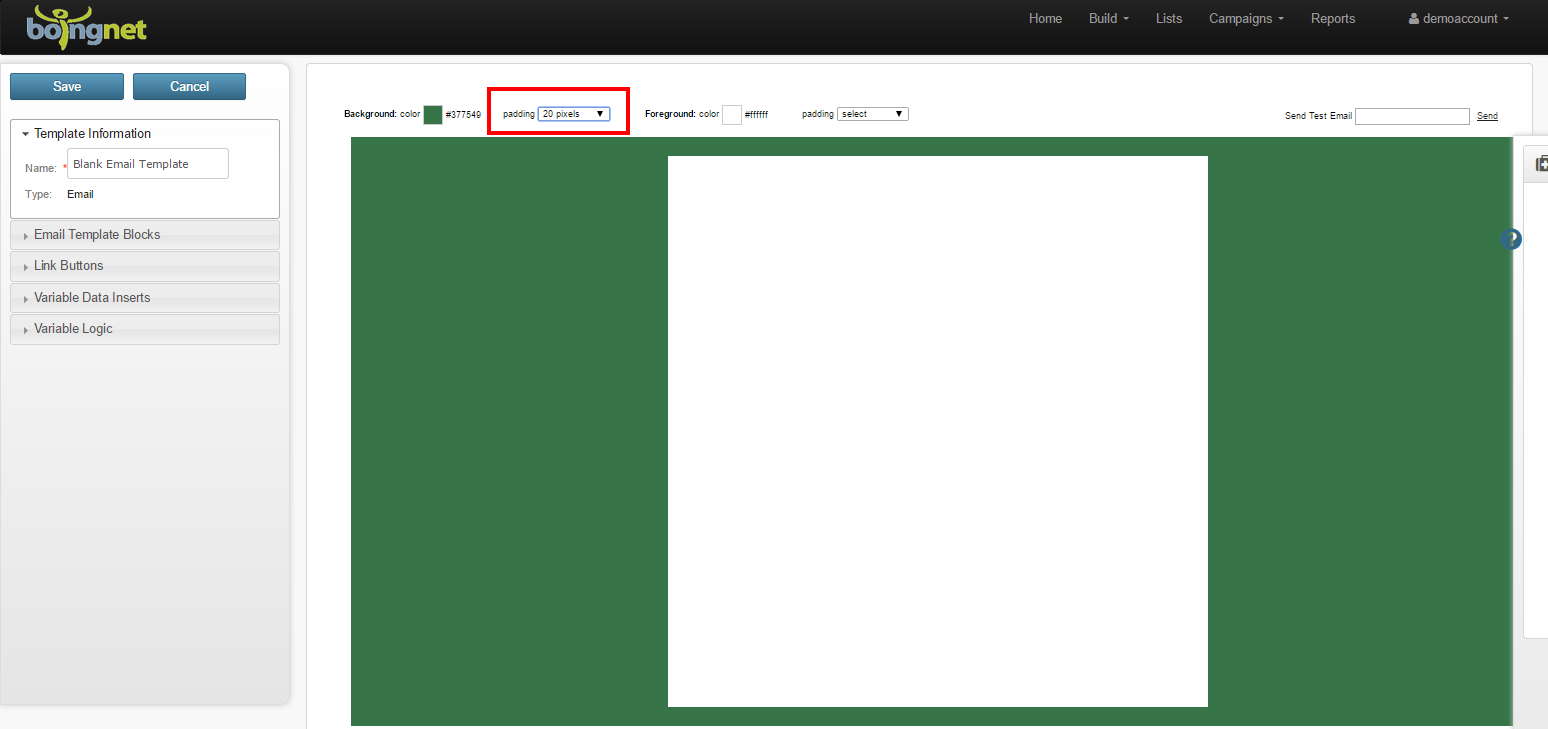
Instant Padding Adjustment:
You can also adjust the padding of your background color. Simply select the number of pixels from the drop down list to the right of the background color picker:
Template Blocks
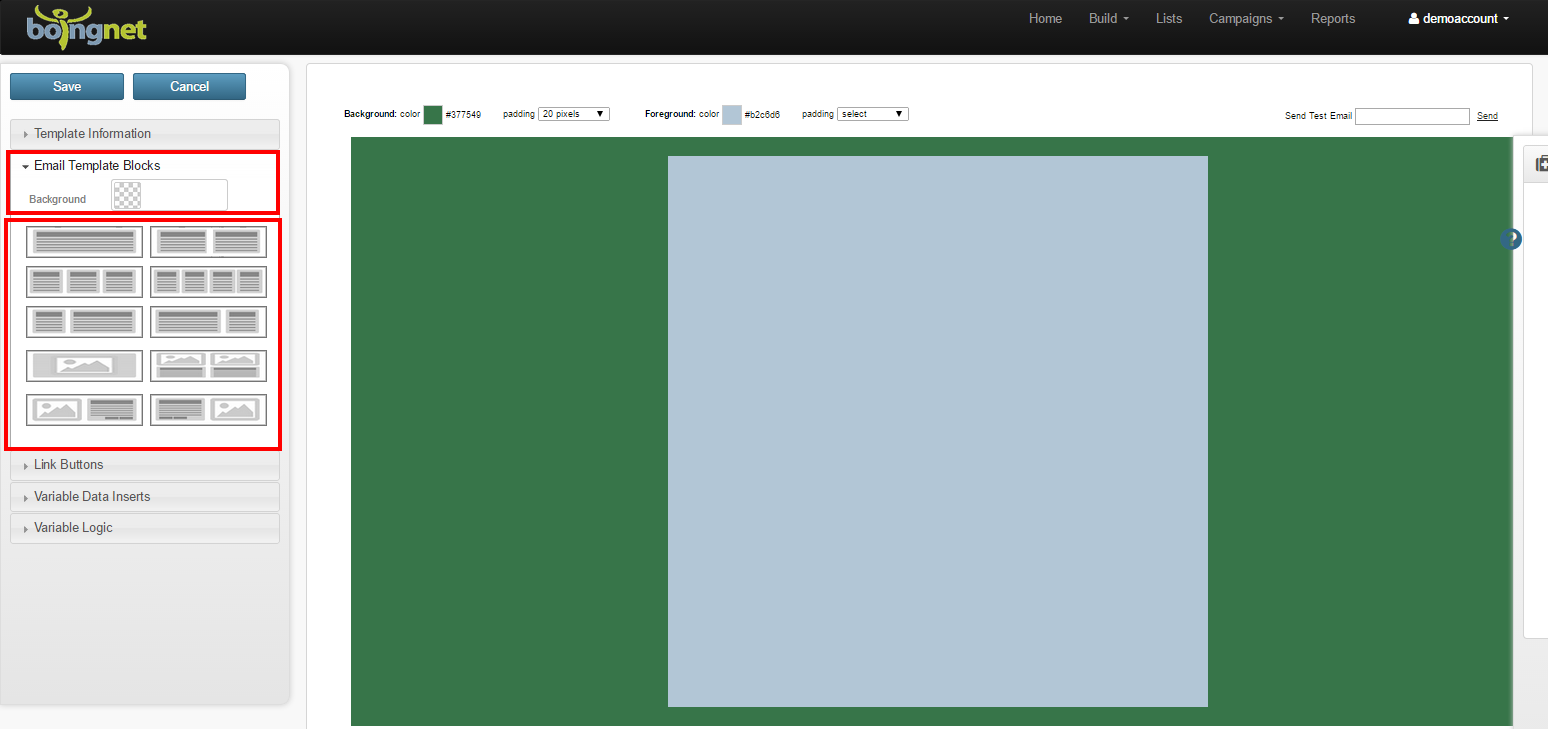
You can add a new template block or module to your email template from within the editor. On the Template Sidebar (left side of page), select Template Blocks:
- Select a background color for your new template block by choosing a color on the right side of the color picker, and then select a shade from the left side of the color picker.
- Select the number of columns for your template block from the images underneath the color picker.
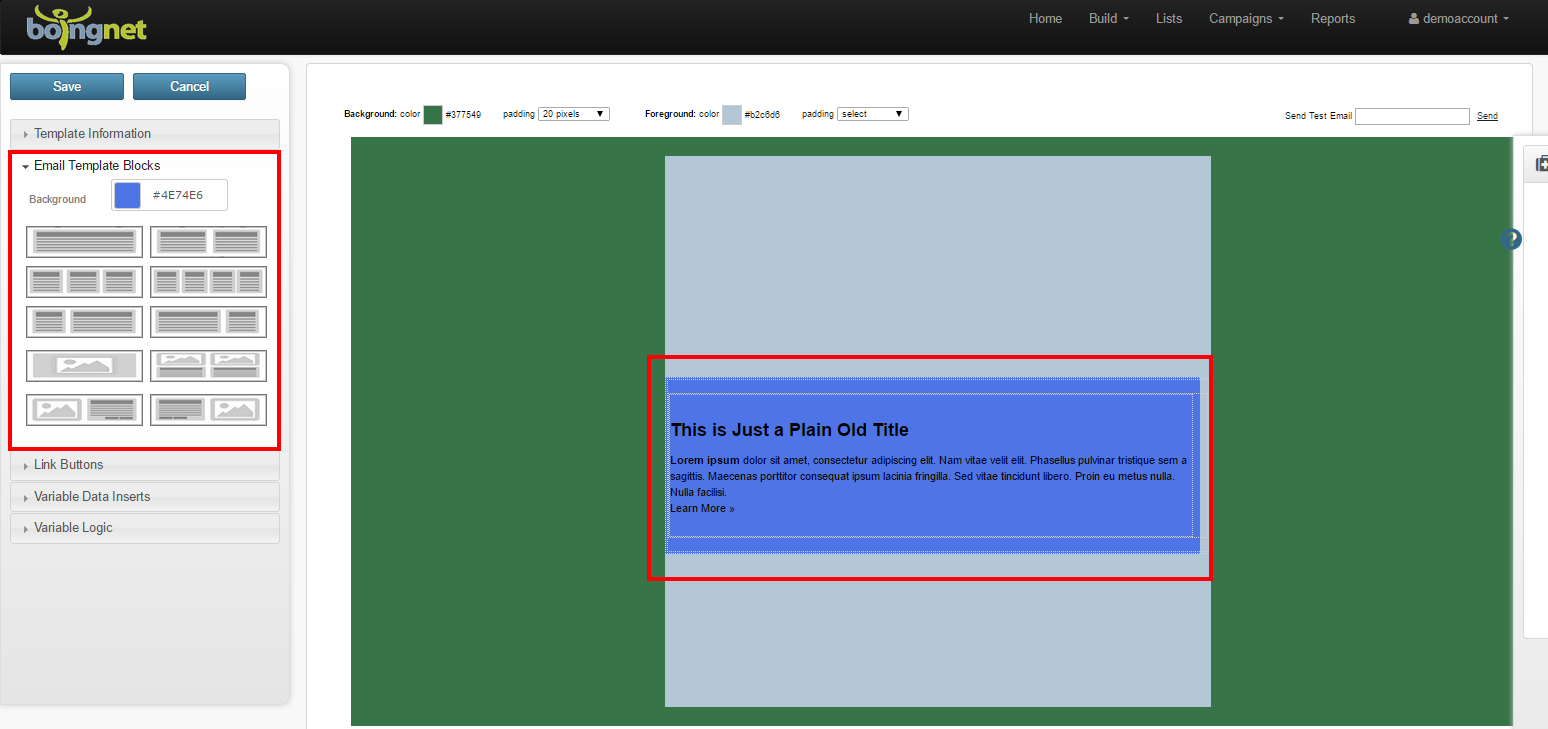
- In the example below, a blue shade and a single column template block were selected:
You can move, resize, delete and change the background color of your new template block by using the icons in the upper left corner of the block.
Link Buttons
You can add beautiful custom link buttons to your email template. Note that this feature is for URL links only, not for pURL links.
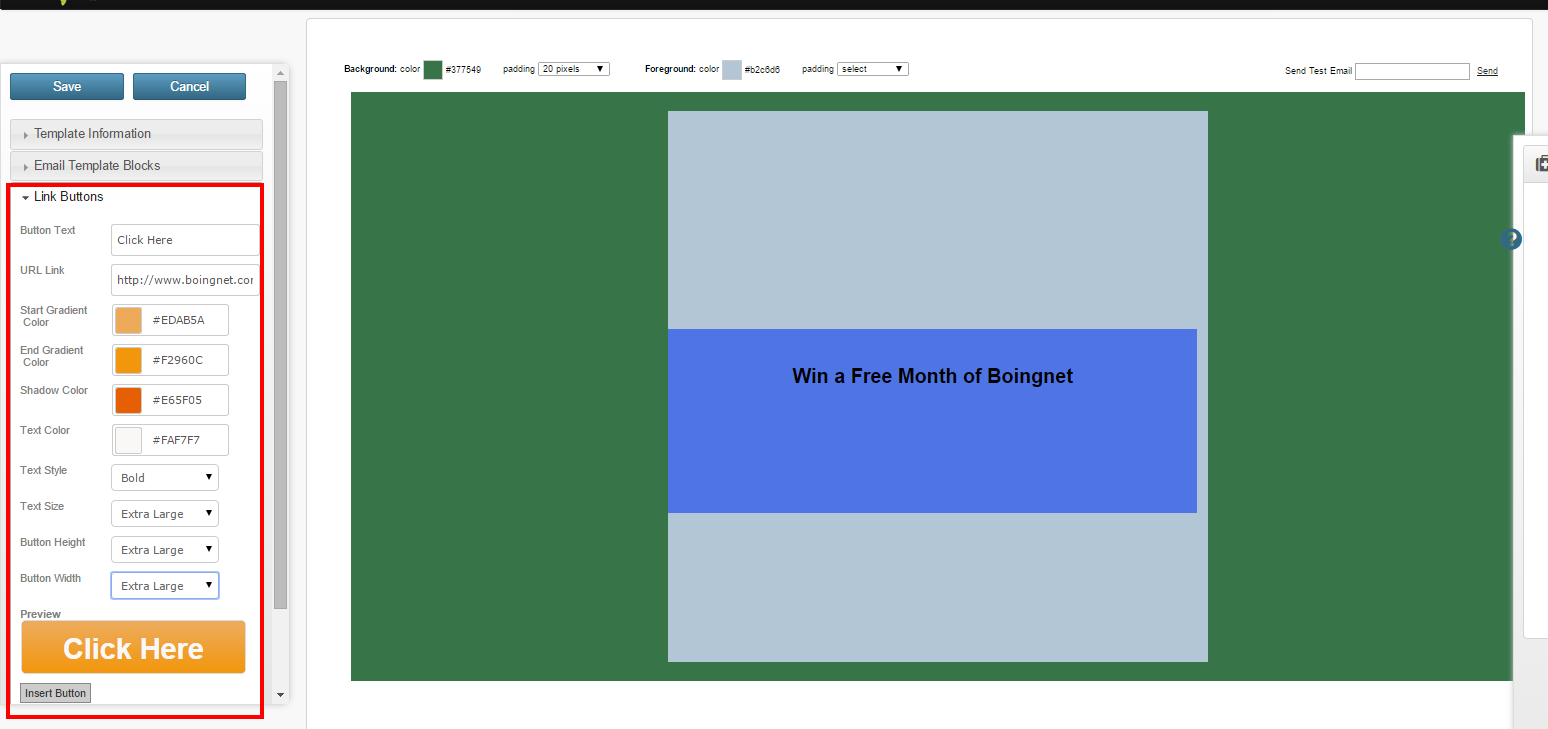
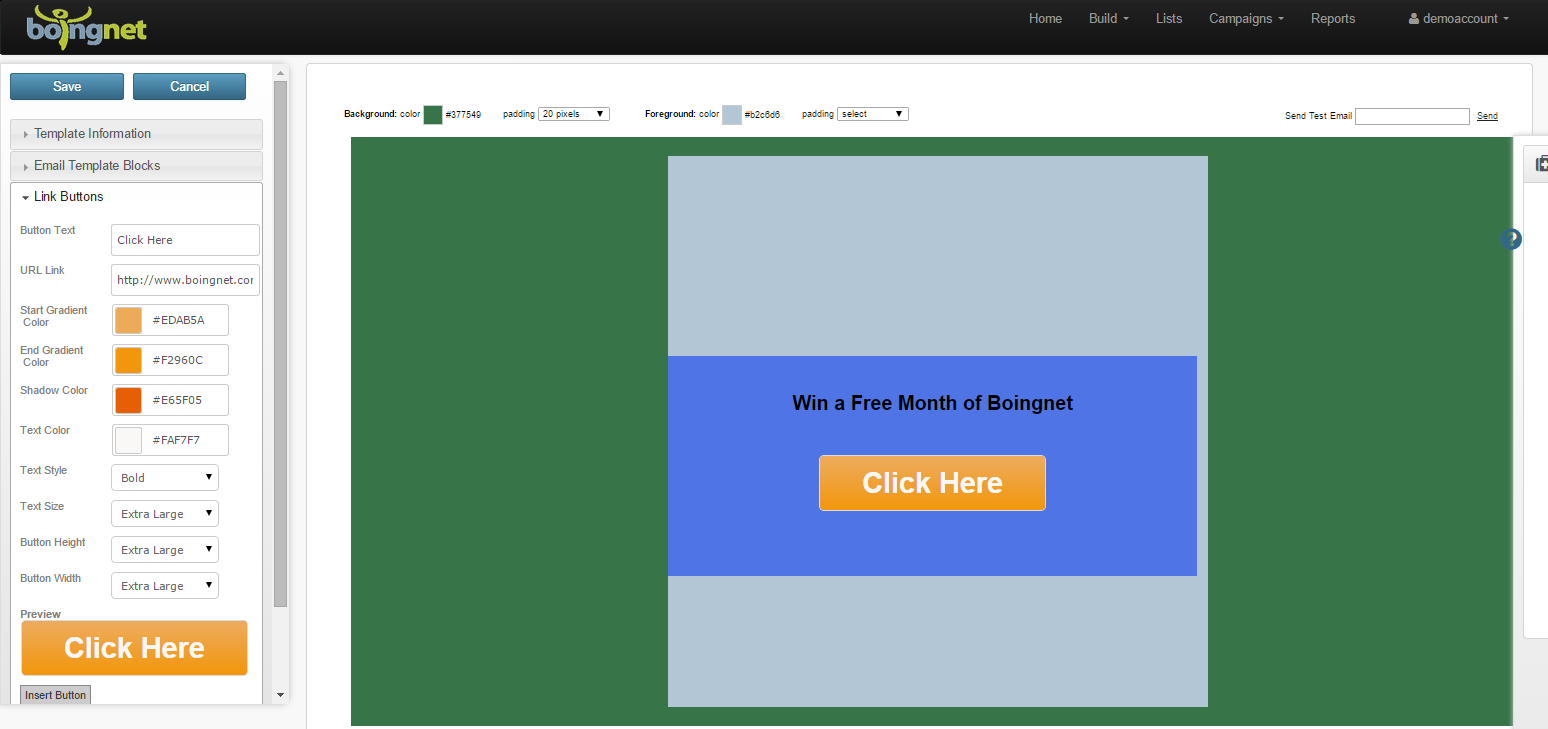
On the Template Sidebar, select Link Buttons:
Design your customized Link Button:
- Next to Button text, enter the text you want to appear on your link button.
- Enter the URL to want your button to link to.
- Enter a Start Gradient Color in the first box. Select a color from the right side of the color picker and then a shade from the left side of the color picker.
- Enter an End Gradient Color in the second box by repeating the process.
- Enter a Shadow Color in the third box.
- Enter a Text Color in the fourth box.
- Enter a Text Style.
- Enter a Button Height.
- Enter a Button Width.
- Click Insert Button.
You can personalize your email message by adding Variable Logic and Variable Data to your template. Inserting variable logic allows you to build email messages that display different content to different viewers based on their unique information – such as state, city or company – contained in your contact list. Inserting variable data and variable logic gives you the ability to add a personalized element to your email which will make your message more interesting to your reader.
Variable Logic
Inserting Variable Logic into your template allows you to conditionally display content based on a customer’s characteristic such as gender. For example, you might want to display different content in your email for male and female viewers. Or you might want to display different content for contacts in different states or zip codes.
Variable Fields
Inserting Variable Fields into your template allows you to display specific customer information – such as your customer’s first name – into your email making your message much more personal and more readable.
On-the-Spot-Email Tests:
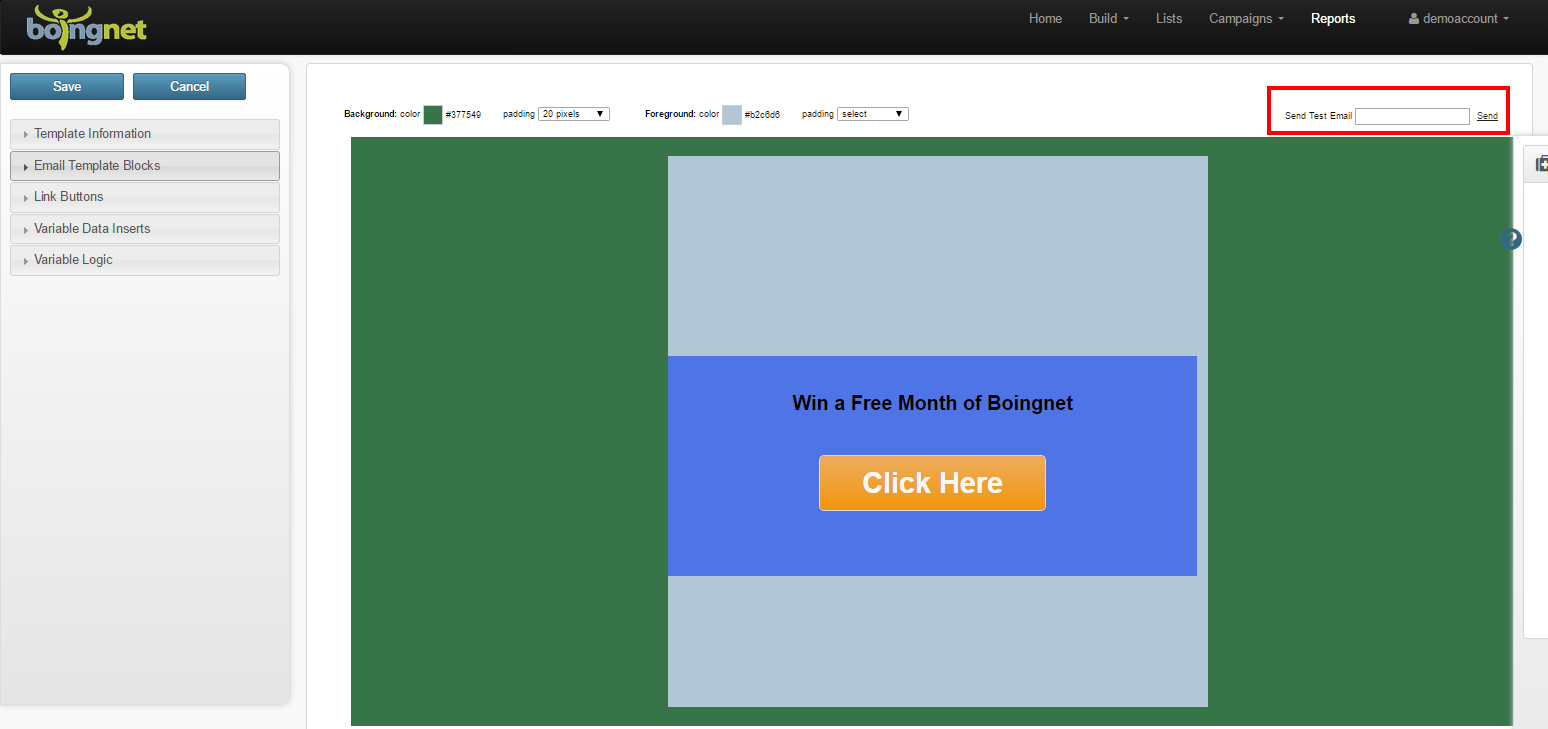
To send a quick email test, enter the email address in the box in the upper right corner and then click Send. This will grab the template from your account and send it to the appropriate email address, it will not pull in Variable Data form a Contact List or display Variable Logic that you may have inserted:
Remember to click Save when you are done editing your email template.
Contact Our Support Forums for Help
We are perpetually seeking to evolve our product as well as our support process. If you didn't find your answer here take a moment to visit our support forums as well as submit your ideas on how we can bring Boingnet to the next level!
Support Forums

